Sunday, December 18, 2016

Christmas Memories with Made With Love

Hello friends!

Can you imagine? Just 7 more days to Christmas! Time has passed by so fast that the year has been just a blurry of faces and places. Thank God for cameras that we can capture those moments to remember by!

Today, I'm on here to share a Christmas layout I created for my LSS Made With Love, using the amazing supplies that can be found at their store.


I had chosen a light and neutral paper from the Kaisercraft Christmas Wishes collection for my background paper as I wanted to use Distress Stains to create the color washes. I had a mixture of splashes (created by forcefully slamming down the tube of Distress Stains on its dabber) and washes (created by using water to dilute the paint). The brush strokes of the clear gesso applied to the background paper before the mediums were added lent a grungy look. I also had stenciled UTEE-embossed stars under all the Stains, resulting in little resist patterns all over.

More details in the close-ups:


Gold-foil words and die cuts as my embellishments. Also added in are Tree Toys chipboard (altered with embossing powder and Distress Glitter) from Blue Fern Studios and sequins from my own stash.


More Gold-foil words. These are a real treat to add to any layout! I also tucked in fussy cut poinsettias, another Blue Fern Studios chipboard (altered with embossing powder and Distress Glitter) and a wooden clock into my cluster.


Some sweet flowers and an epoxy sticker. You can see some of the finer background details like the different stamps I had used.


A lovely metal tag from Tim Holtz to top up the sentiment, nested on a bunch of sweet Christmas flowers from Prima Marketing.

List of supplies (available from Made With Love):

paper: Kaisercraft
gold foil die-cuts: Kaisercraft
Distress Stains, Distress Glitter: Ranger's
Embossing powder: WOW!
chipboard: Blue Fern Studios
metal piece: Tim Holtz
flowers: Prima Marketing Inc.

Thanks for joining me today, and have a Merry Christmas!


Thursday, November 3, 2016

Memoires with Blue Fern Studios

Hello friends! 

Today is my turn on the Blue Fern blog and I'm excited to be showing you a couple of projects I've created with the beautiful new collection by Michele!

This collection had me digging up old photos from the attic. My first layout is one of my folks when they were on their honeymoon.


Keeping the background really toned down because of the details in the paper that I wanted to show.

Close-ups:


Mesh bits chipboard which I had altered with Clover and Grassy Knoll embossing powders.I also fussy cut an element from Calling Cards which made a lovely addition to this floral cluster.


Another cluster with the other half of the Mesh Bits chipboard, layered over another fussy cut from Calling Cards and a bit of the Cuckoo Clock chipboard.


The Cuckoo Clock chipboard which I painted with copper metallic paint and added a couple of shiny bits on.


My title piece which I altered with Copper, 14 Karat and Antique Gold EP.


My second project is a video tutorial which I had created with also papers from the Memoires collection. This features a photo of my dad and me on a holiday trip.


A fair bit more details in the background as the paper was suitable for some playing around with. I also deliberately chose the Daisy Collage chipboard to match the paper because of the brick motif.


The clock piece from Cuckoo Clock chipboard, of which the main clock was used in the first layout. I also used Late Winter Lilies throughout the layout because they added so much softness to the page.


Sparkly antique feel created for the Ever After Frame.


Daisy Collage tucked between the paper layers.


More of the Daiy Collage.

You can view the creative process in this video:


Sunday, October 30, 2016

5 Questions with Made With Love


Hello friends!

Today is my turn on the Made With Love blog. Right now I'm actually enjoying a long-awaited family vacation and taking lots of photos for memories. Can't wait to get home and scrap those!

But first, today's post is a special segment on the Design Team and who we are. I'm going to take some time out to show you one of my favourite projects and answer some questions at the same time!

This mixed media canvas was created for MWL sometime back with lots of the Finnabair products, as well as Blue Fern Studios chipboards. What I like about this piece was that it has been in concept for the longest time - ever since I found out about black gesso (which has a been a few years), I wanted to do create something that is based on that and just screams for attention. It wasn't until the Opal Magic acrylic paints were available that I knew I had the right ingredients for this piece. 

Personally, the past 3 years was all about discovering who I am and learning to love myself for it. We are often our harshest critic and there was a period of acceptance and growth where I gradually started to feel comfortable in my own skin. Knowing where my heart lies and moving towards the pursuit of true happiness has brought me closer to my family and God.


 Below are just some of the close-ups:


And now for the questions!

1. Who am I?

I'm a mother of 3 wonderful children - 2 boys and a girl - and wife to an amazing husband. I used to work in cancer research and forensics, but now work as a digital marketer from home so that I can still be with my brood. I picked up scrapbooking when my eldest was born but only dabbled in mixed media when my second child arrived. It was love at first sight as it gave me a lot of creative space to work with than just mere paper and glue.

2. What is my creative style?

Mostly shabby chic with pastel colors. I love to layer and layer and mix the colors around.

3. What inspires me?

Mostly my kids. They are quite a photogenic bunch so during the weekend family outings, we would take photos that I had conceptualized. So sometimes, the layout would have been planned for months, right down to the attire, location and materials to be used.

I also like to visit blogs of other scrap artists. There is a wealth of ideas to be found there, although most times I'm just awe-struck by the gorgeous works.

4. What I love about being Singaporean?

Everything is so convenient and safe! Growing up in Katong, I could walk down the street in the middle of the night and still be overwhelmed by the choice of food available. Need to grab something and still run errands? There's always a mall somewhere that allows me to do everything together, and with really short traveling time too. When I was staying with my aunt in Tucson, Arizona, it takes a 2-hr drive just to get to the nearest Asian grocery store in Phoenix City, so we would stock up on months' worth of food in the deep freezer. Compare that with NTUC that is just 5 mins' walk from my flat. No horse run.

5. What do I wish for?

World peace.

Nah... but I do hope that we can leave a good legacy behind for our children. Be it the way they are raised, a good education, a world with less strife and more love, or an Earth that is not trampled upon and destroyed by greed.

And that's all I have for today. Thanks for dropping by!


Monday, September 19, 2016

September Inspirations with Made With Love


Hello friends! Hope all are well with you guys!

Today I am sharing a project I created for my LSS Made With Love with some gorgeous supplies from their store at 313 Somerset. It's been awhile too since I did a tutorial for them, so here is a photo step-by-step to show you how I created this canvas.


1. Prime the canvas with gesso. 


2. When the gesso has dried completely (important!), create some texture on your background using UTEE powder, a stencil and some embossing glue. Use a heat tool to melt the UTEE powder.


3. Layer papers to create your main cluster. 


4. Prime your chipboard with gesso. Create a resist pattern with a stamp, white embossing powder and embossing glue.


5. Color it with Distress Stains, using water to blend. 


6. Ink the sides too to make it pretty.


7. To color the background, I'm using Tim Holtz Distress crayons. These are so fun to work with!


8. I spread out the colors in the order they came in, like a mini-rainbow.


9. Using baby wipes, I activated the pigment into paint and could control the intensity and blending between each color very well. 


10. Ta-da! Add more interest with stamps.


And this is the finished canvas after I added more stuff. It's my eldest boy's first birthday and a family photo we took. I'm planning to make a gift of it for my in-laws during Christmas. 

Details in the close-ups:


Altered chipboard from Blue Fern Studios


Background details showing the UTEE powder, Distress Crayons and stamping at work.


Cute whimsical title


And here are the supplies I used from Made With Love:

papers - Bo Bunny (Double Dot Design), Echo Park (I Love Family)
chipboard - Blue Fern Studios
mediums - Prima Marketing Inc (gesso); Distress Crayons (Tim Holtz); UTEE powder, Embossing powder, embossing glue, archival ink (Ranger's)
title sticker: Thickers
stamps: Prima kareting Inc, Kaisercraft
stencil: The Crafter's Workshop

Saturday, September 3, 2016

Seaside Memories with Blue Fern Studios

Hello friends, how are you?

September is now upon us, and the weather here is becoming a little cooler with more rain. But I'm still very much in a summer mood because of the Seaside Cottages collection. Today I'm here to share two more creations with you. 


This has to be one of the simplest layout I have made in a long time with just splashes of paint in the background because the paper is too pretty to cover up. The photo is one of my boys on the day we landed in Okinawa after a really long flight. We had made our way to a sea salt factory and the view out is just amazing, with the sun starting to set.

Some details:


The Seaside Charms chipboard, which I had painted with gold acrylic paint and covered with a layer of crackle paint. 


My title piece which I had embossed with Breeze and Sky Blue embossing powders.


The top half of the Seaside Charms chipboard which I had snipped off.


My second share is another layout of my second boy when he was a baby. I love how the colors of the photo matched the background paper Embark so perfectly that I built the whole layout around this.

Details here:


Altered seashell and anchors matched with the seaside lilies.


My title piece


Fussy cut details


Mesh bits chipboard tucked behind my photo


More chipboard goodies!

And here is the start to finish video of how I put this layout together:


Thanks for dropping by! 

Wednesday, August 3, 2016

Hello friends, how have you been? 

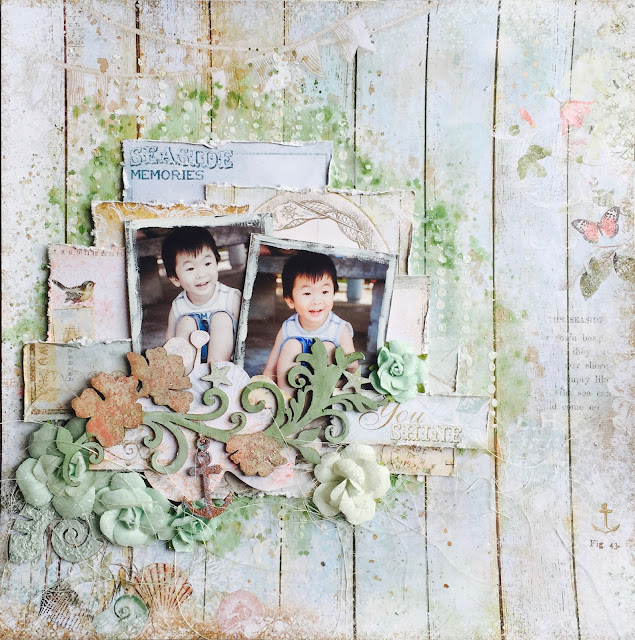
July has been very exciting and now that August is here, I'm looking to better times ahead! Today I'm so glad to be sharing with you two creations using the fabulous new collection Seaside Cottages. This set of papers speak right to my heart and to say it was love at first sight is a great understatement. Michele has outdone herself yet again with this gorgeous beach-themed collection filled with soft colours and stunning images.


My first layout is of my eldest having some fun with his feet in the sand. Woodgrain is really my thing and I had to use it for the background. Seeing that the paper is so full of details, I toned down my background work and used to it accent the colors on the page. 

Details in the close-ups:


An anchor from part of the Seaside Flourish chippie which I had embossed with Copper EP from Imagine Ink and painted some turquoise acrylic paint over for a tarnished look. The petals were sprinkled with Dusty Pink glitter.


Layer, layer, layer! That's what you do when you have so many pretty papers at hand! Here, I built up lots of dimension with scraps from Calling Cards, Voyage and Splendour. 


Using a Calling Card sentiment as my title. The little stars on the flourish chipboard were also given a nice coat of Sunshine glitter.


My second share is a mixed media canvas and I had used so many fun stuff on it! The starfish and shells that you see are actually from a potpourri set and they smell amazing!


This is the Seashell Frame which I had a lot of fun altering with EP and duo-toned acrylic paint.


A little sailboat from Nautical Set. Check out the background - it's one of the patterned papers from Seaside collection and I didn't have to do much to make it look so grungy and vintage all at the same time!


Who doesn't love a dolphin? I have one here with some seaweed chippies. Check out the Seaside Lilies that come as part of the coordinating flowers - they are so perfectly distressed that I didn't have to fiddle with them at all. 


Mr Octopus saying hi.


I seem to have a thing for anchors again! This one is embossed and wrapped with a piece of twine.


A title piece from Calling Cards, matched by the Seaside Roses.

And here is the video of how I put everything together. Sit back and enjoy!